This post may contain affiliate links. If you use the link I receive a commission at no extra cost to you. Thank You!
Create Your Pinterest Account
I am going to be completely honest here. I am not going to create another Pinterest account from scratch. It isn’t particularly difficult and you can find other resources online. Before you are able to pin though you need to have an account.
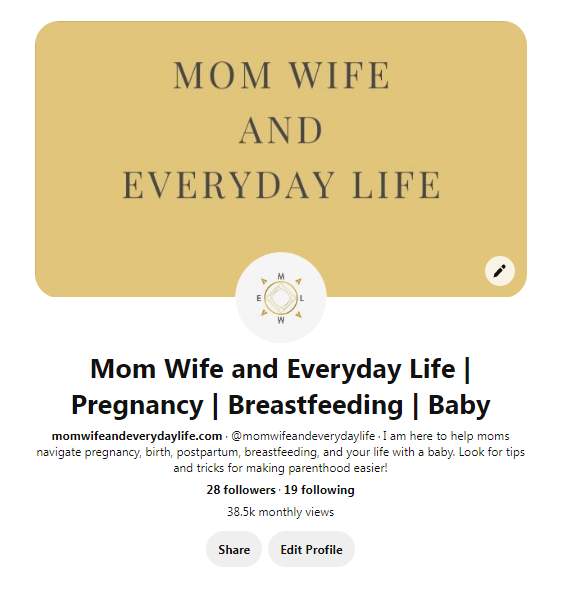
Here is a quick look at my business page.
You want to fit as many keywords and useful information as possible in your main profile. Before you can see my real-life stats after one year of blogging. I have 28 followers and am following 19 accounts. When I captured this shot I was getting 38.5 K monthly views.
By no means are these amazing stats. But they are where I am currently at. Maybe you can relate.
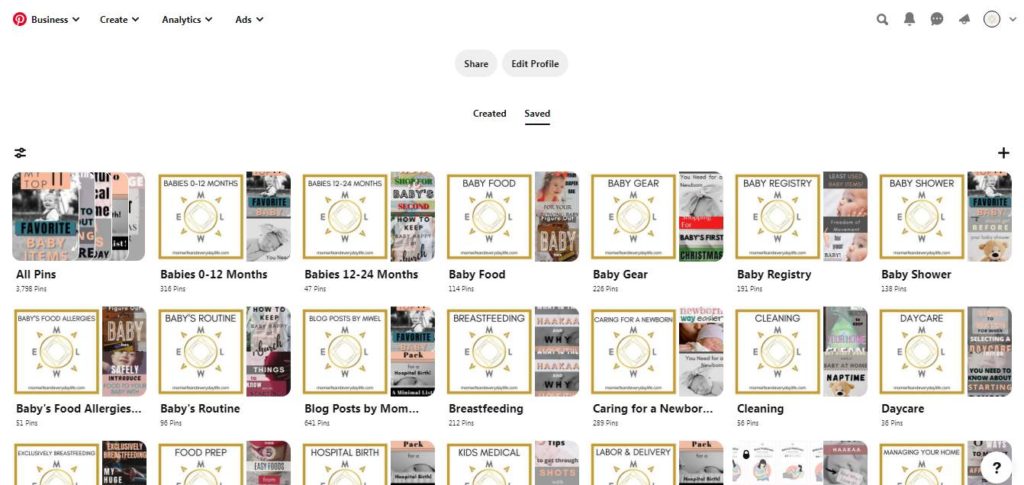
Next we are going to take a look at some of my boards. You can see the title of each board as well as the number of pins inside that specific board at this time.
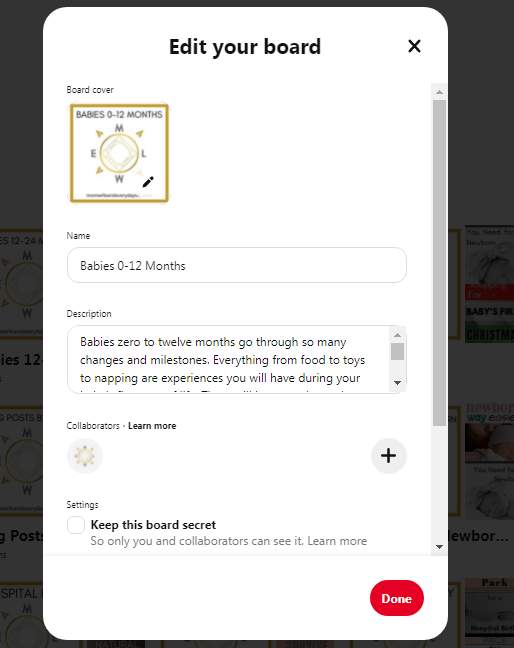
Next i Clicked on a specific board to edit it. This is where you can put a board title, description, and decide if you want it to be visible. Make sure you board title clearly stats what you can hope to find in that board. This is also a time to maximize your description with key words!
Those are some of the basic features of your Pinterest account. If you are starting an account for your blog or other type of business you should use a business account rather than a personal account. You should also make sure to claim your website.
How to Get Pin Images
Now let’s get to the part of pin creation. Before starting on your pin creation you need background images. You can purchase stock photos, use free stock photos or take photos yourself.
The pro to stock photography is the images are typically better than what you can take yourself if you are an amateur. Now if you pay for stock photography you have an added expense. Therefore the stock photography I have used thus far has all been free.
The con of free stock photography is that everyone can be using and finding the same images. If you scroll through a specific topic on Pinterest you will notice repeat background images.
Let’s jump into what I do.
Below is the website I use for free stock images. Upsplash.com
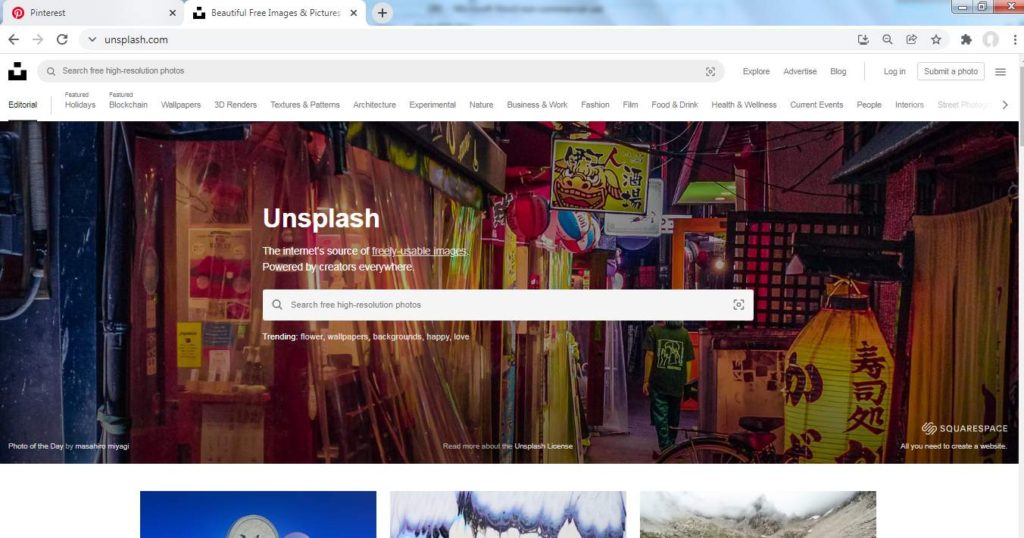
Once you are here you want to search a topic. I searched baby bottles free. The “free” may not be necessary. If you notice the first two row are premium images that do cost you money. They will typically be the best image for your search query.
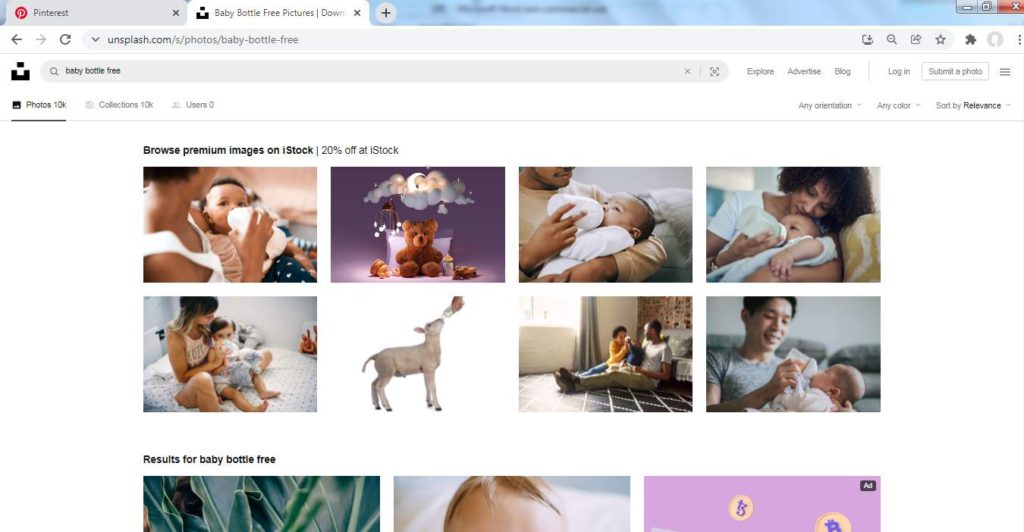
Below is an image I selected. As you can see there is no baby bottle in the image. However, I felt this image could work for an article discussing baby’s feedings.
It is a beautiful image.
Another thing to note with any form of photography is the file size is likely going to be HUGE. This can be a problem relating to the speed of your website.

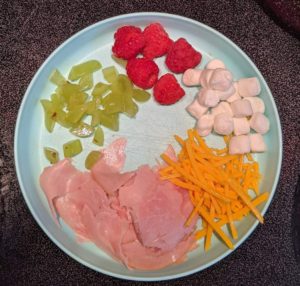
This picture is for an article about what my toddler eats in a day. It a picture I took myself on my phone..which is not the latest model by any means.
You can tell it’s not so great.
So why would I take my own pictures?
Well first off this image directly related to what I am writing about.
Secondly, Pinterest is currently interested in fresh content. Fresh can mean many different things.
A unique picture that no one else has access to could very well beat a stock images used hundreds if not thousands of time.
Just something to think about!
Compressing Images
All of my images are compressed before they go onto my website or onto a pin. I wasn’t doing this in the very beginning, but learned it could be important regarding load time.
If you go on to Pinterest the location you place you pin images currently says,
“Recommendation: Use high-quality jpg. files less than 20 MB or .mp4 files less than 2 GB”
I don’t follow this rule to a tee, but it is a reminder to make your images or video compressed down in size.
There are plenty of software options to do this. You can get plugins for WordPress as well. I prefer to compress before even hitting my website and then allow the free plugin to compress what is maybe still too large or slipped through the cracks.
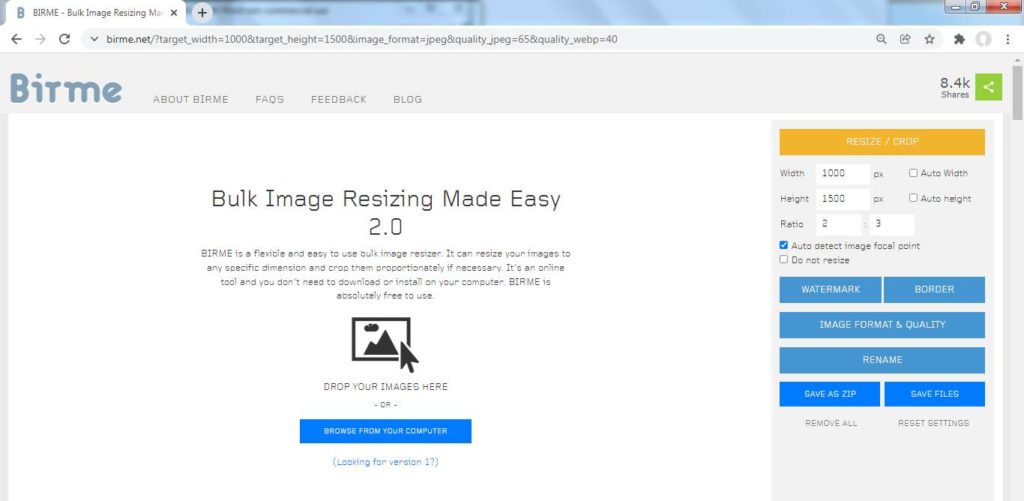
The compression software I am currently using is Birme. I would like to mention that it is free to use.
I have figured out howto use a few different features such as compressing to a specific size or compressing by decreasing quality to a specific level.
I place my originals, compress them as desired and then move them over to one of my many folders.
I have folders and folders of organization for my blog.
So at this point we have background images that are compressed. Now we are going to take them over to Canva and create a full on pin!
Ok, so here we are in my free Canva account. I have been using the free version for a year. I am sure the paid version has great features, but I figure you can’t miss something you never had.
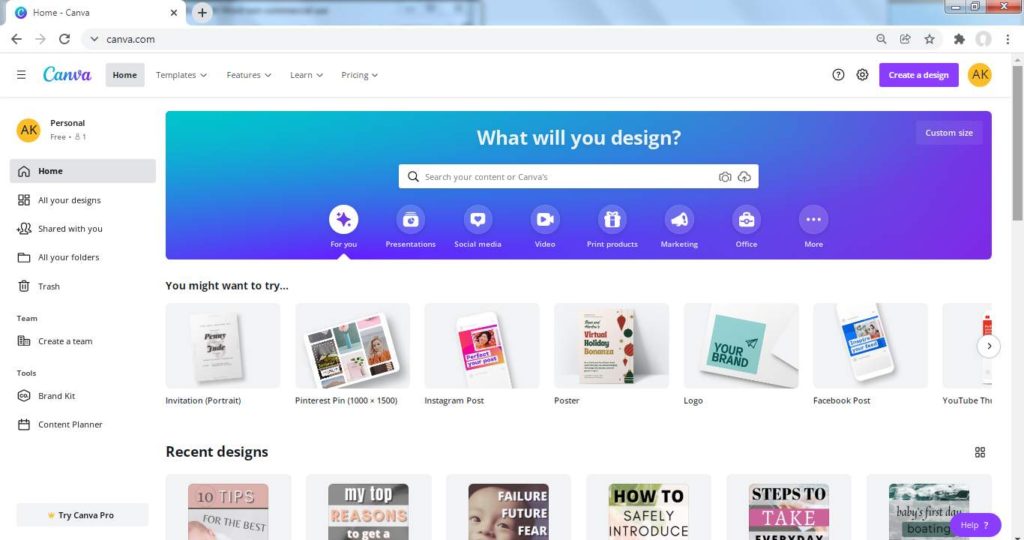
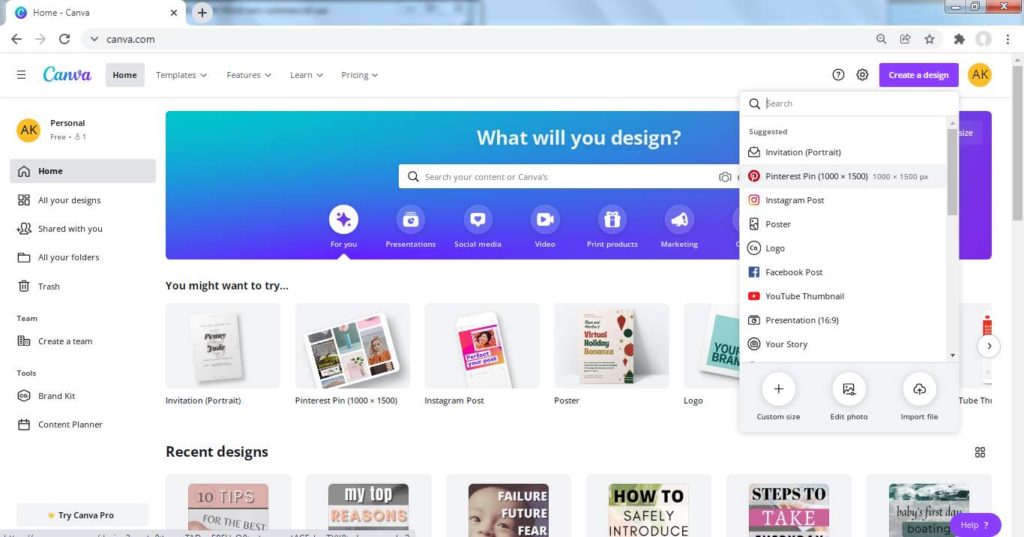
Your first step is going to be to create a design. The purple button in the top right!
You get a drop down that gives you basic shapes for your design. There is a 1000 X 1500 px pin layout. This is where I go.
You can customize when needed though. For example, when I created my logo I did a square of I believe 400 x 400 px.
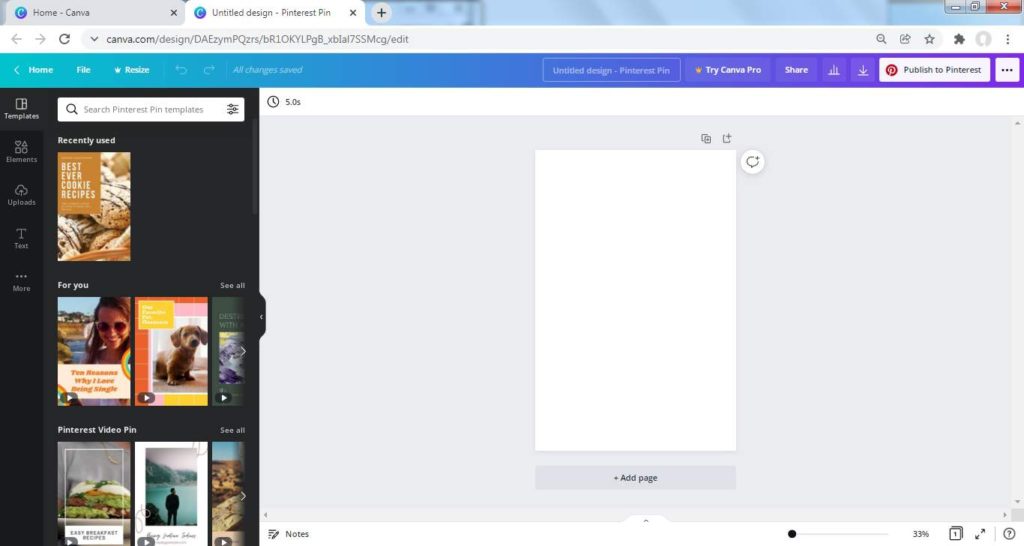
After clicking you will come to this blank pin template.
Let’s get to making this pin!
On the left there you should see a upload button. This is where you can pull pictures that are stock or self taken.
As you can probably tell the first two images are stock, while the toy pictures are ones I have taken. In the future I need to take some time to sharpen my photography skills.
They are seriously lacking!!!

Here you can see that I pulled an image over. I then made a copy a slightly altered the position of the picture.
This is an easy way to make stock photos more interesting. Someone may use the same photo as me, but it is set at a completely different angle.
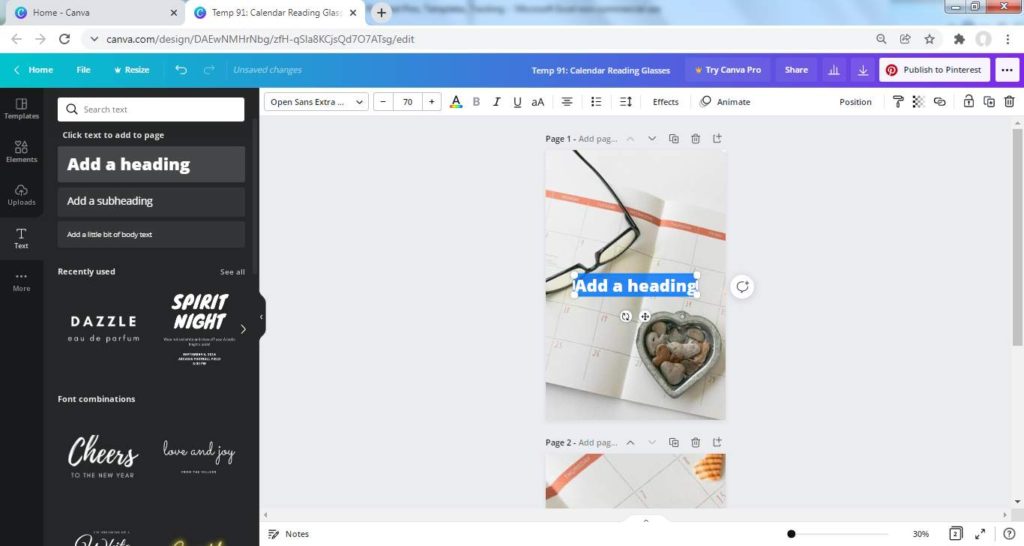
You may also notice in the purple bar that I took the time to name my template. Each image gets its own template number. So template 91 here may be used for pins that go with article 5, 27, and 42 because they are all about schedules.
Naming the templates and assigning a number helps me track everything and stay organized.
Time to add some words to this image.
On the left side you can see “Text” click there. You can simply “add a heading” or you can use the provided designs available there.
Type your article title or something similar that will catch the reader’s attention. You can easily change the size of the words by dragging the corner of the text box or by typing them in at the tool bar. You can also see other fonts that are available. I suggest finding a handful and using them frequently. This will create better brand recognition.
If you notice the “position” button in the tool bar on the right side you can align or center the text box easily.
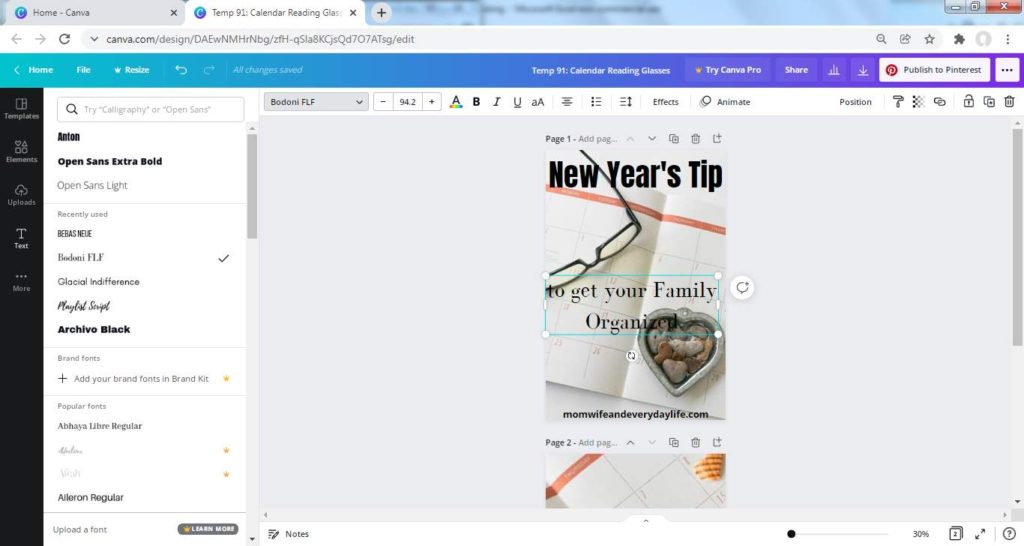
Now let’s tweak things a bit more. You can see the title isn’t standing out well because the glasses are cutting through.
We are going to place some background to help this problem.
Ont he left side you click on “elements” You can simply type in square
I selected and placed the square but the coloring was not letting the background show through at all.
The checkered symbol allows you to make the box more or less transparent.
This is one of my go-to features.

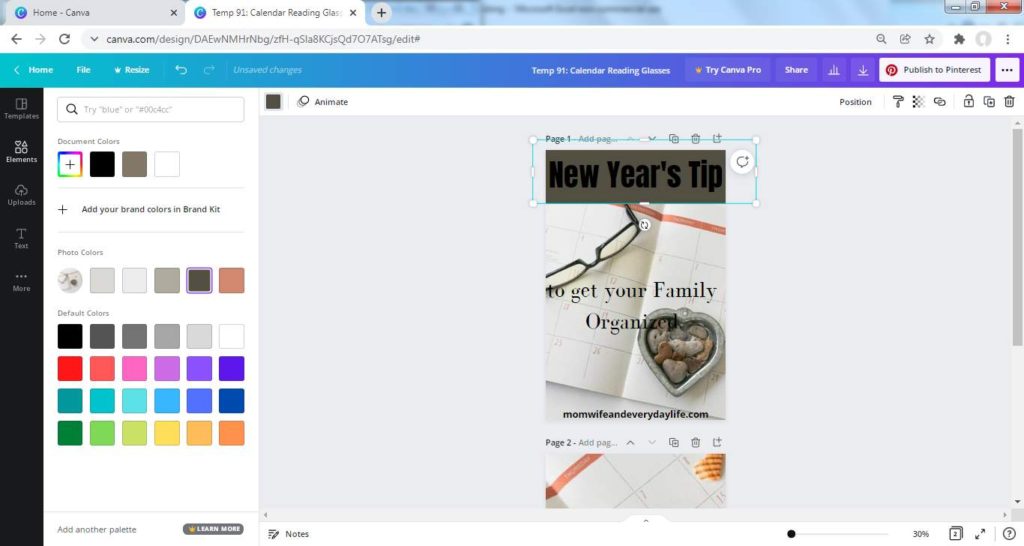
I am still not liking the dark words on the dark background. Time to change the font to a white color for the words to pop.
I also added another box of color to make the center words more readable. This time I went with a rounded edge.
One final thing I would like to mention is the branding at the bottom. I don’t really know if this is worth doing or not. It let’s people know before they click who created this information. I have actually found that for myself if a blog loads slowly once I will avoid clicking ins with the same branding.
Basically I think it could be a positive or negative thing.
People also say it stops others from stealing your pins. I really can’t say on this. To me you can look at my design and go recreate it for yourself. Please don’t of course!
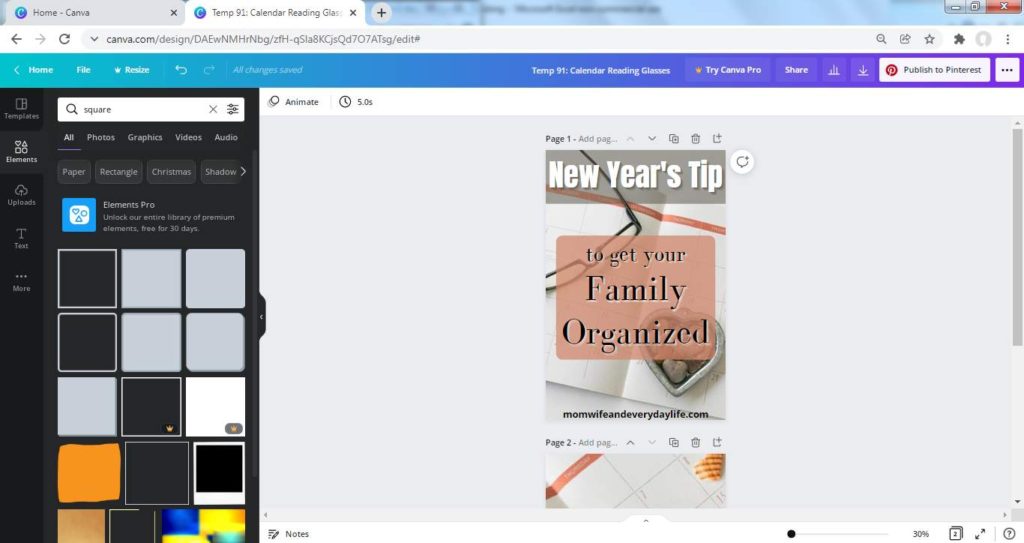
At this point we have a single pin created. I don’t stop there though. I create 3 additional slightly altered versions of the pin.
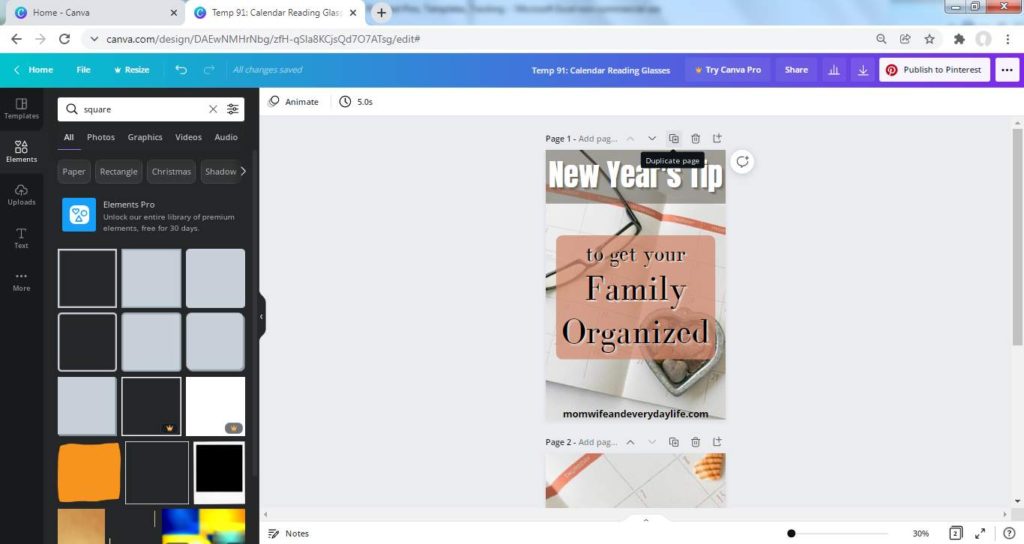
See where it says “duplicate page” That’s what we want! But first wait! Check out the next instructions.
Ok so here is a trick I have learned. First make one copy. So #1 is the original. Now on #2 right click the background image and detach it from the background.
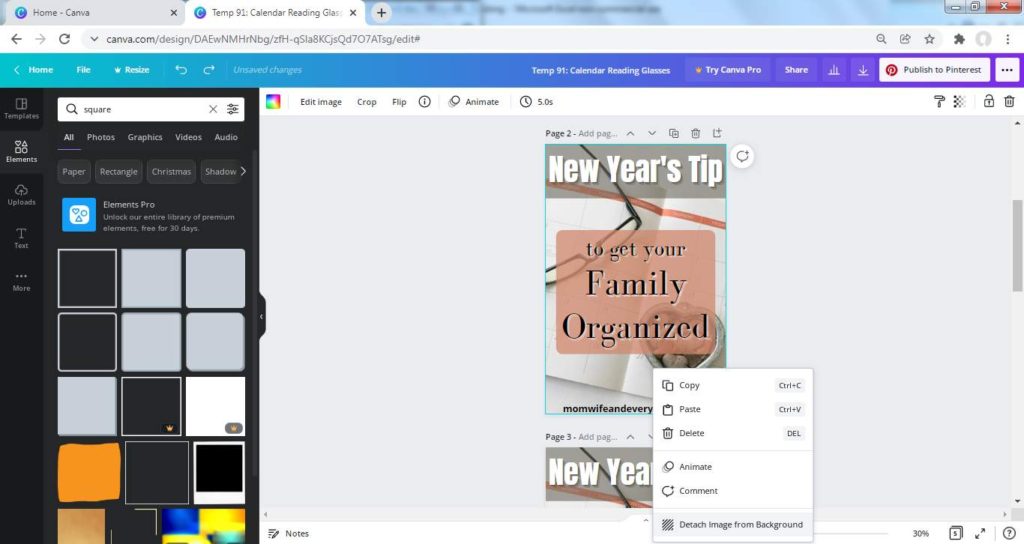
As you can see it is all messed up, but not really. Make copies of #2. I get to where I have 4 total pins. You can do as many as you think. It is up to you if you make any copies at all. You many only make one copy of the pin and publish it to the most appropriate board. I choose to publish to my top 4 most appropriate boards.
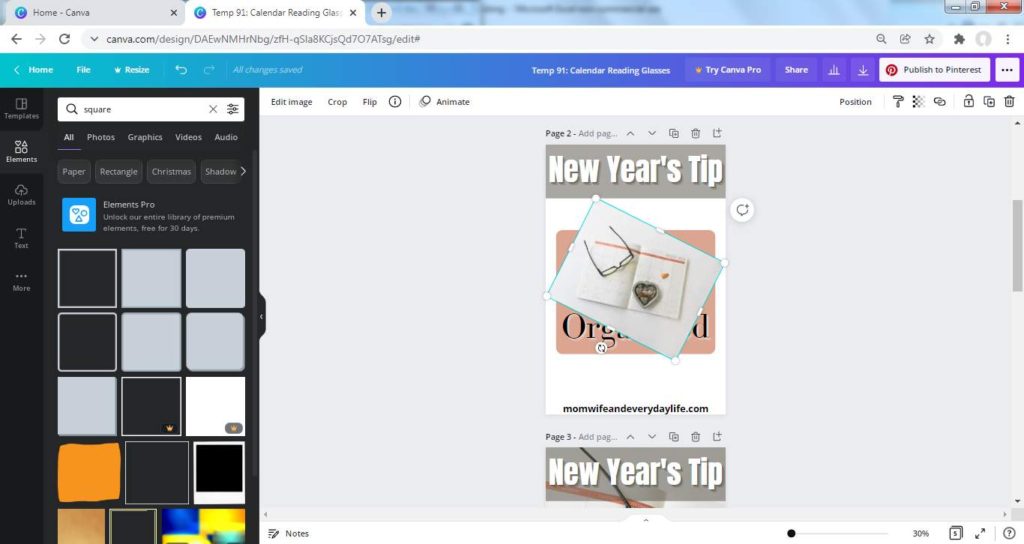
So #1 is the priginal and #2 #3 #4 all currently look like what you see below.

Then you can go through and slightly alter the background image. You can flip it, crop it, edit it, and rotate it. You just want to stretch it back out to cover the entire pin and right click to send it to the back.
You can change to font colors or styles as well.
The goal here is to make quick and easy changes so your 4 pins are slightly different.
The image below was rotated to a different position.
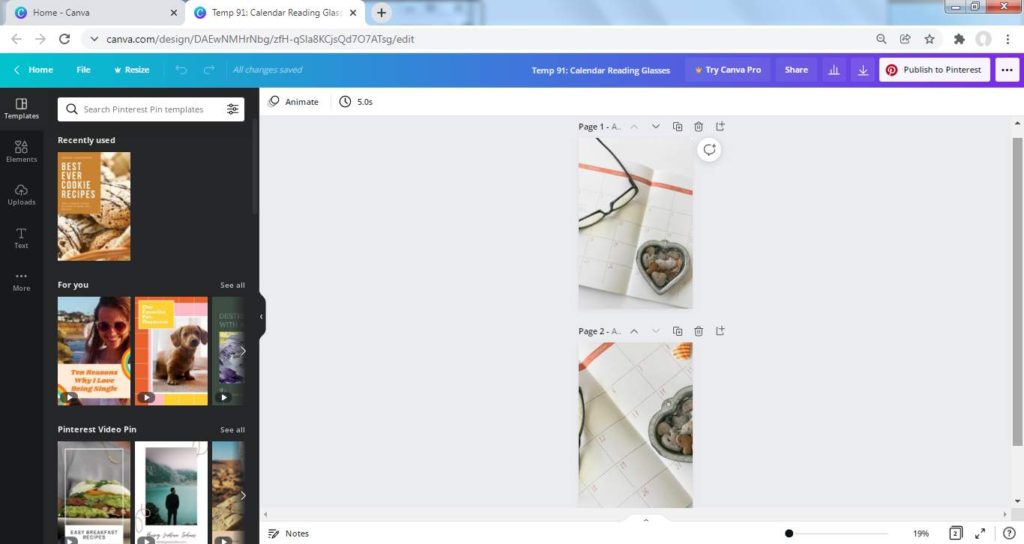
If you look at the next image it is a zoomed out view of what I have created. You might not be able to tell, but there are 4 unique copies.
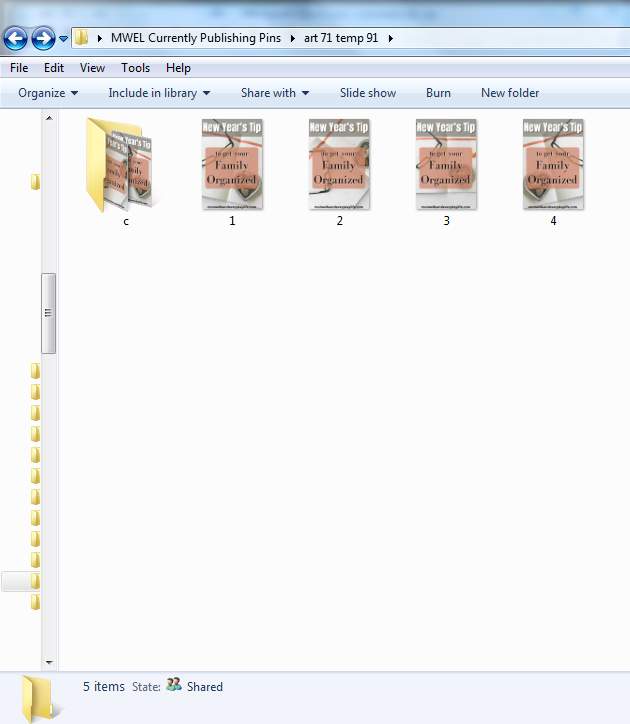
I am done working on these and want to move them over into a folder.
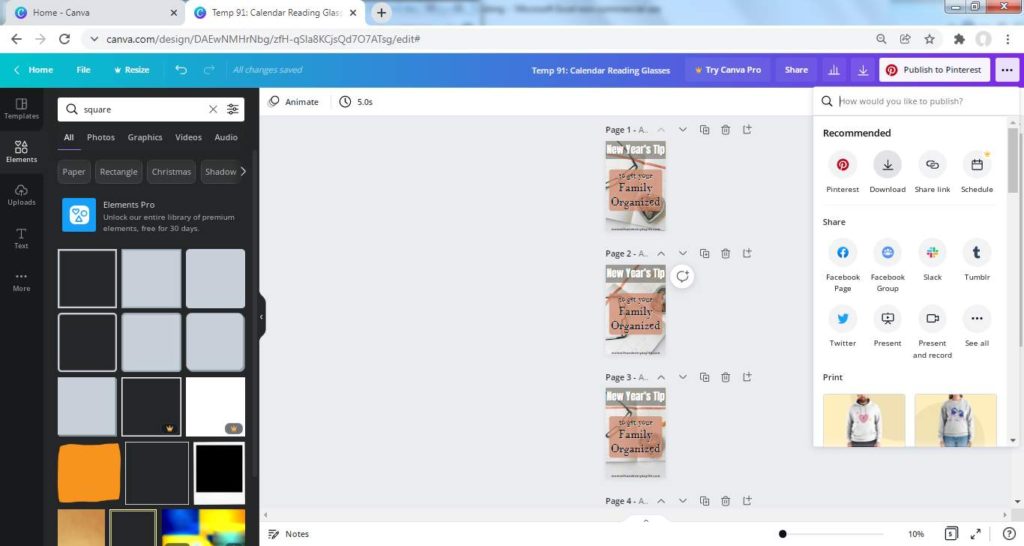
In this version of Pinterest click the … on the top right to get you to these options. I believe in the newer version of Canva you click share and find download. Download is what we are after either way.
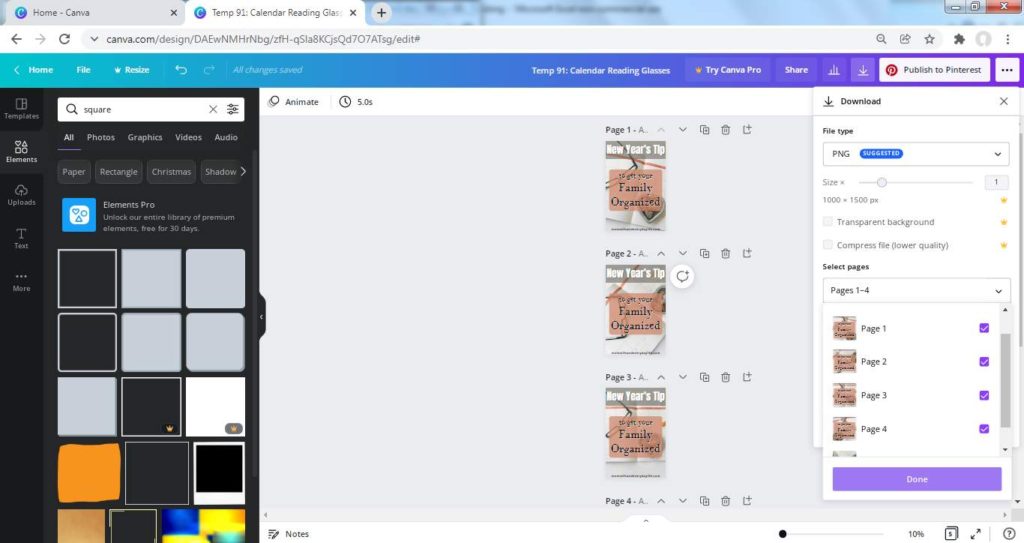
Here you specifically click which pages you want to download. Click done. You can then place them into whatever folder you have set up to store them.
Now we are going to compress the pins we downloaded. As you can see on the right I have 4 pins in a folder. I then moved them over to Birme to be compressed. Once they are compressed they go into the “c” folder.
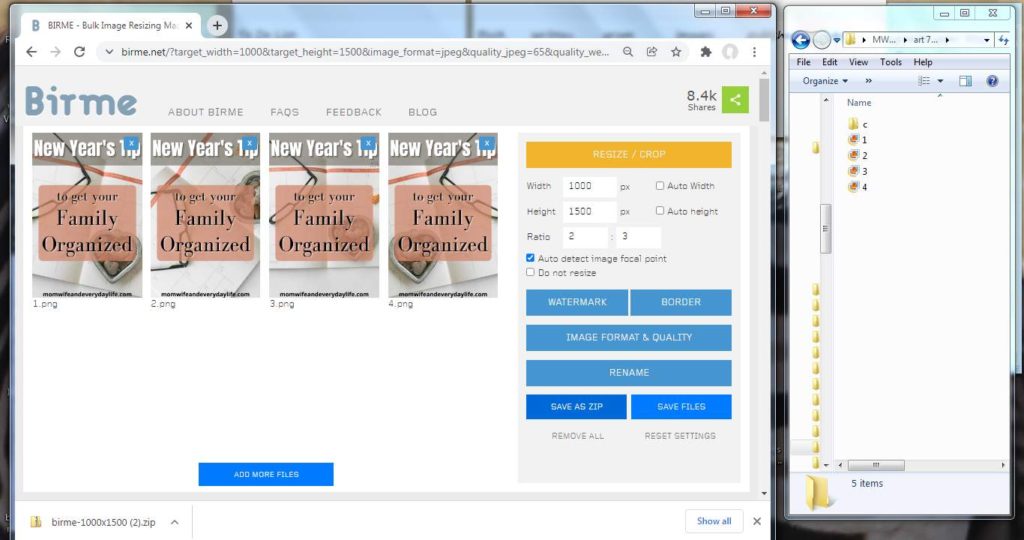
The originals and compressed pins are in this folder. Our images are ready to go!
Manually Publishing a Pin
Now let’s jump back over to your Pinterest account. I’m once again assuming you have it basically set up and can manage basic navigation.
We are going to publish a pin that connects to an article about getting organized for the New Year. These 4 pins are going to go to 4 boards.
I choose to manually pin on the Pinterest platform. You can do so for free and schedule pins out about 2 weeks in advance.
Manually pinning is free, whereas using a program such as Tailwind will cost you money.
Under the create button click create pin.
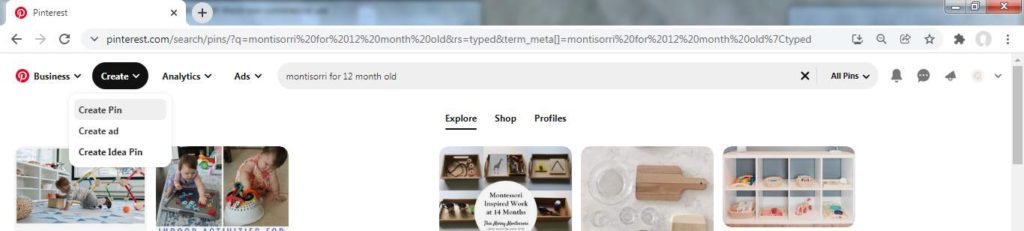
Here you have your blank pin. If you notice it went ahead a picked a board. I will change this before publishing.
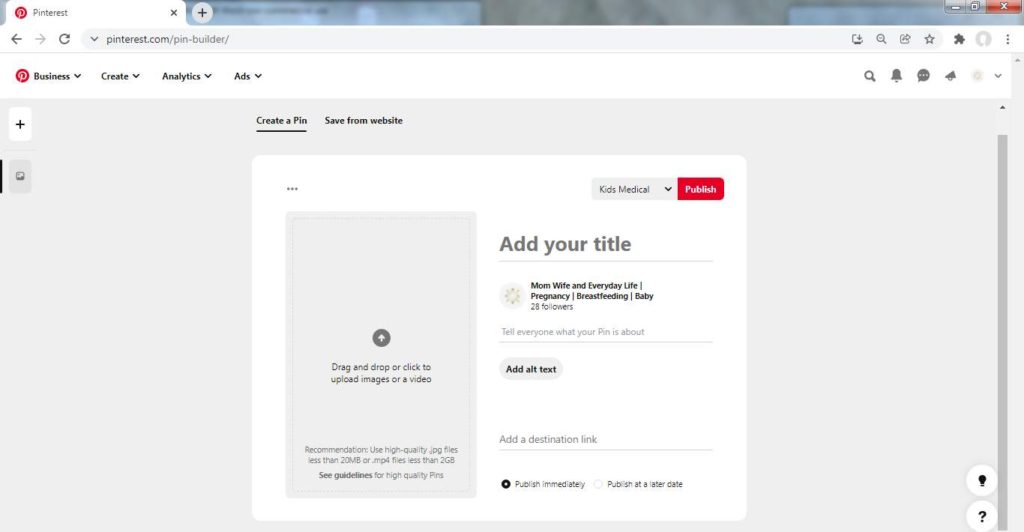
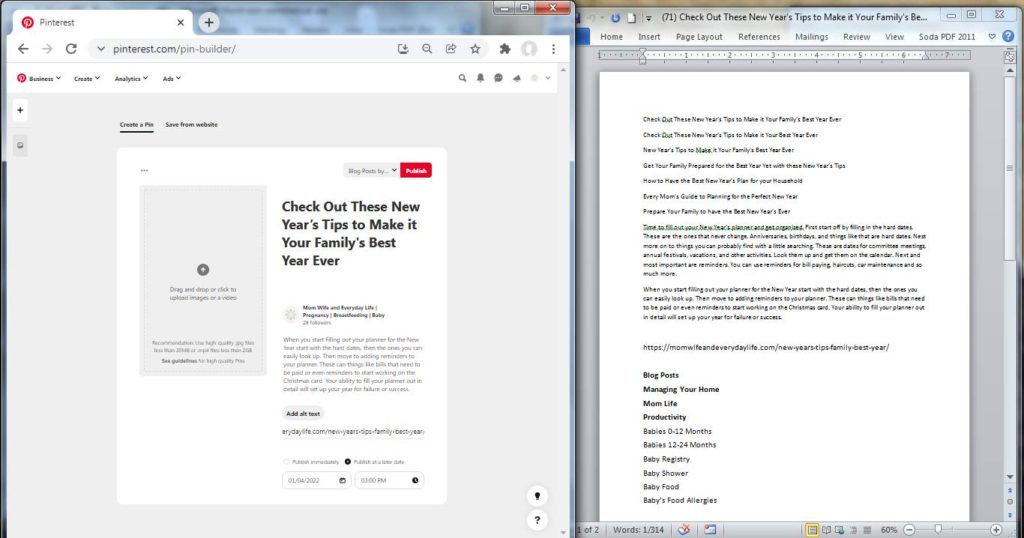
Now this is what I have learned about manually pinning. Nobody taught me this and I haven’t heard of it anywhere else. Coming up with the title, description, URL, boards, and images is a lot all at once.
I created what I call a Quick Pin Template. Every time I publish a new article I fill in this information to make pinning easier.
I save my best titles from when I was brainstorming for my article title. I write out a few descriptions. I copy and paste the URL. My list of Pinterest boards get listed and I bold the ones that apply to the specific article and more then to the top.

This is what it looks like with some of the information filled in. This is quickly done with copy and paste.
I also change the date and time.
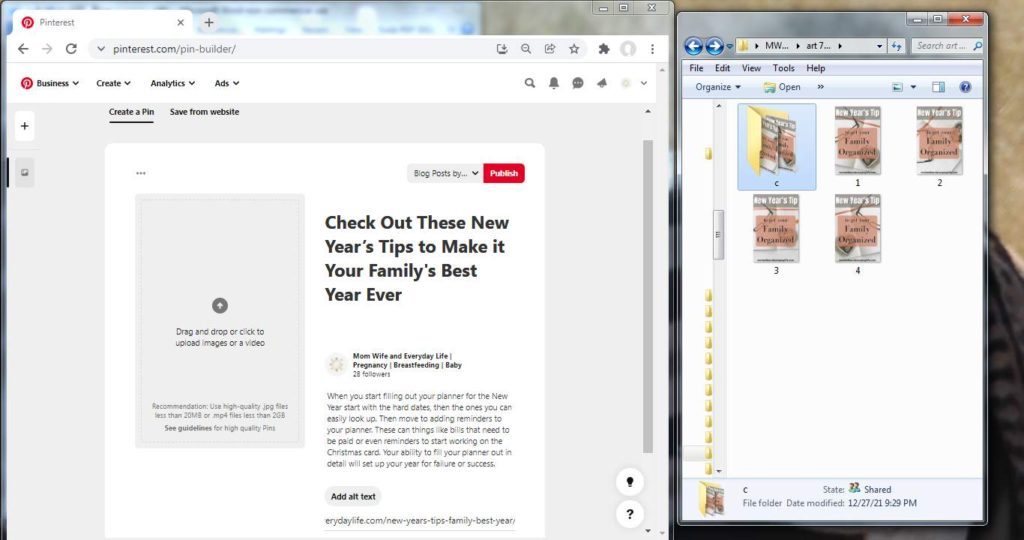
Once that information is inputted into the pin it is time to make 3 more copies of the pin. Look on the far left side of the pin for the … to create copies. You click duplicate.
Once you make the copies you need to go through and change the dates. I go with every other day. So my pins, for example, would go out January 6, 8, 10, and 12th.
The change the board to 4 different boards that best fit the article topic.
The last things we need to do is add the pin images.
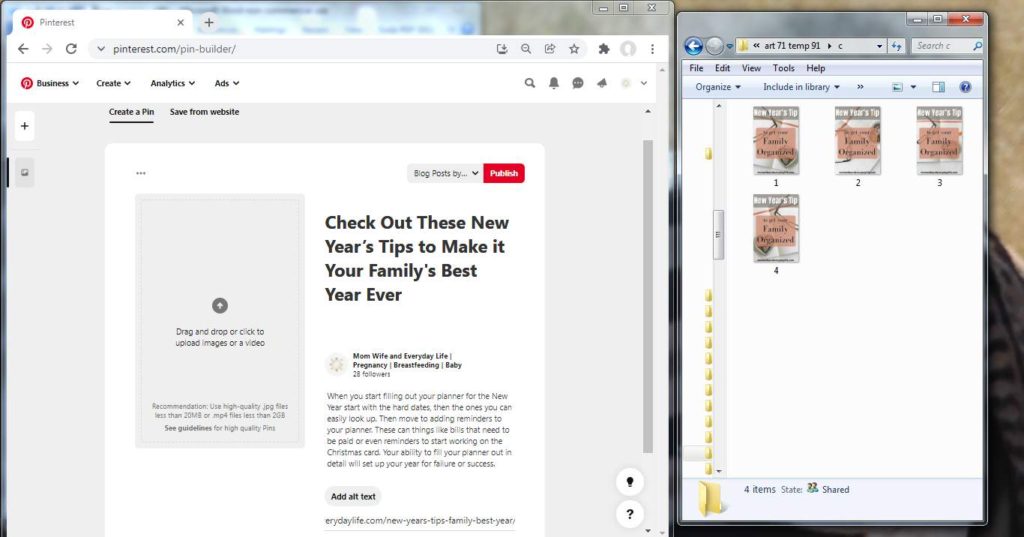
Let;s go back to the folder we stored them in. Make sure to grab the compressed images.
Here we are in the compressed folder.
Now you can just drag and drop the images into the pins.
Once the images are in the pins do a quick look over at all four pins. Check the boards and dates to make sure your pins are going where you want and when you want.
The final step is to publish the pins!
There is a circle on the right. Click it.
Then on the left click select all.
Now hit Publish on the right.
Benefits of Batching
Based on all the steps it took to get a single pin published I hope you can recognize the importance of batching content.
When you take or upload photos do 50 at a time. Make it an hour-long process. Then when you create pins make multiple templates at once.
Type out as many descriptions as you can when the article you just wrote is fresh in your mind.
With the quick pin templates you can publish pins quicker and easier.
Without this technique you are jumping on to WordPress to grab the URL and remind yourself what the article was about. Then you are jumping back on to Pinterest. Plus you have to open your folder to grab the images.
I find the quick Pin Templates beneficial!
Maybe other people have a better system and they just aren’t sharing it!
Conclusion
There are probably more shortcuts out there than what I have shown you. I am by no means an expert. I am learning as I go and trying to become more efficient every day.
My pinning strategy may not be perfect either. Pinterest is constantly changing so it is hard to know what is correct.
Take the basic principles I showed you and use them in your own pinning strategy.
These may not be perfect Pinterest strategies. Notice my title did not make any promises about your traffic exploding. My goal here is to give beginners a look at the process of creating pins, or at least the process I currently use.
I hope you found this helpful!
Check Out my Articles
Steps to Take to Have a Successful First Month Blogging
My First 6 Months Blogging Income and Traffic Report Mom Wife and Everyday Life
Why Do I Have to Reload Every Time I Manually Publish Pins?